- Published on
Spring-解析配置类
ConfigurationClassPostProcessor核心难点类
重要说明
- AnnotationConfigApplicationContext 加载了配置类M,如果M里面有N 注解了@Bean,在N里面在使用 @Configuration 注解引入其他类P,是不能生效的。
- 由于spring如何解析配置类都是源码分析,主要需要你自己去调试;而且基本就是几个递归,故而没有什么原理性的东西。
关键点:spring当中一切皆配置类;但是如果实现了特殊接口的就不会是配置类(需要自己去实践)
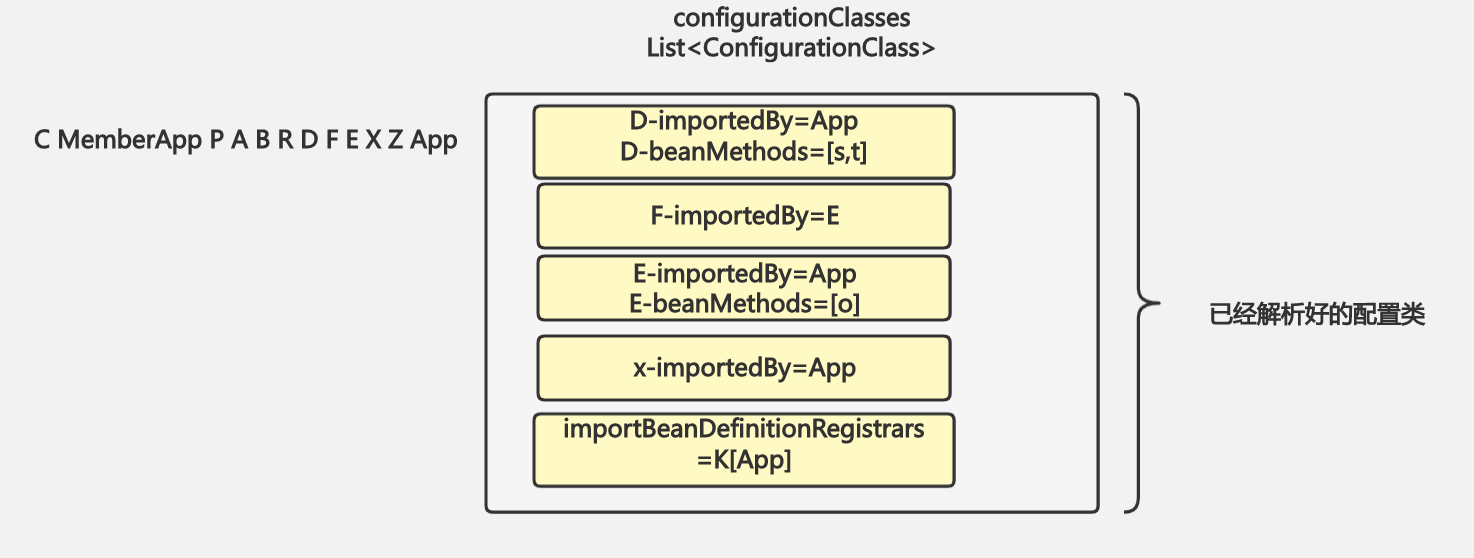
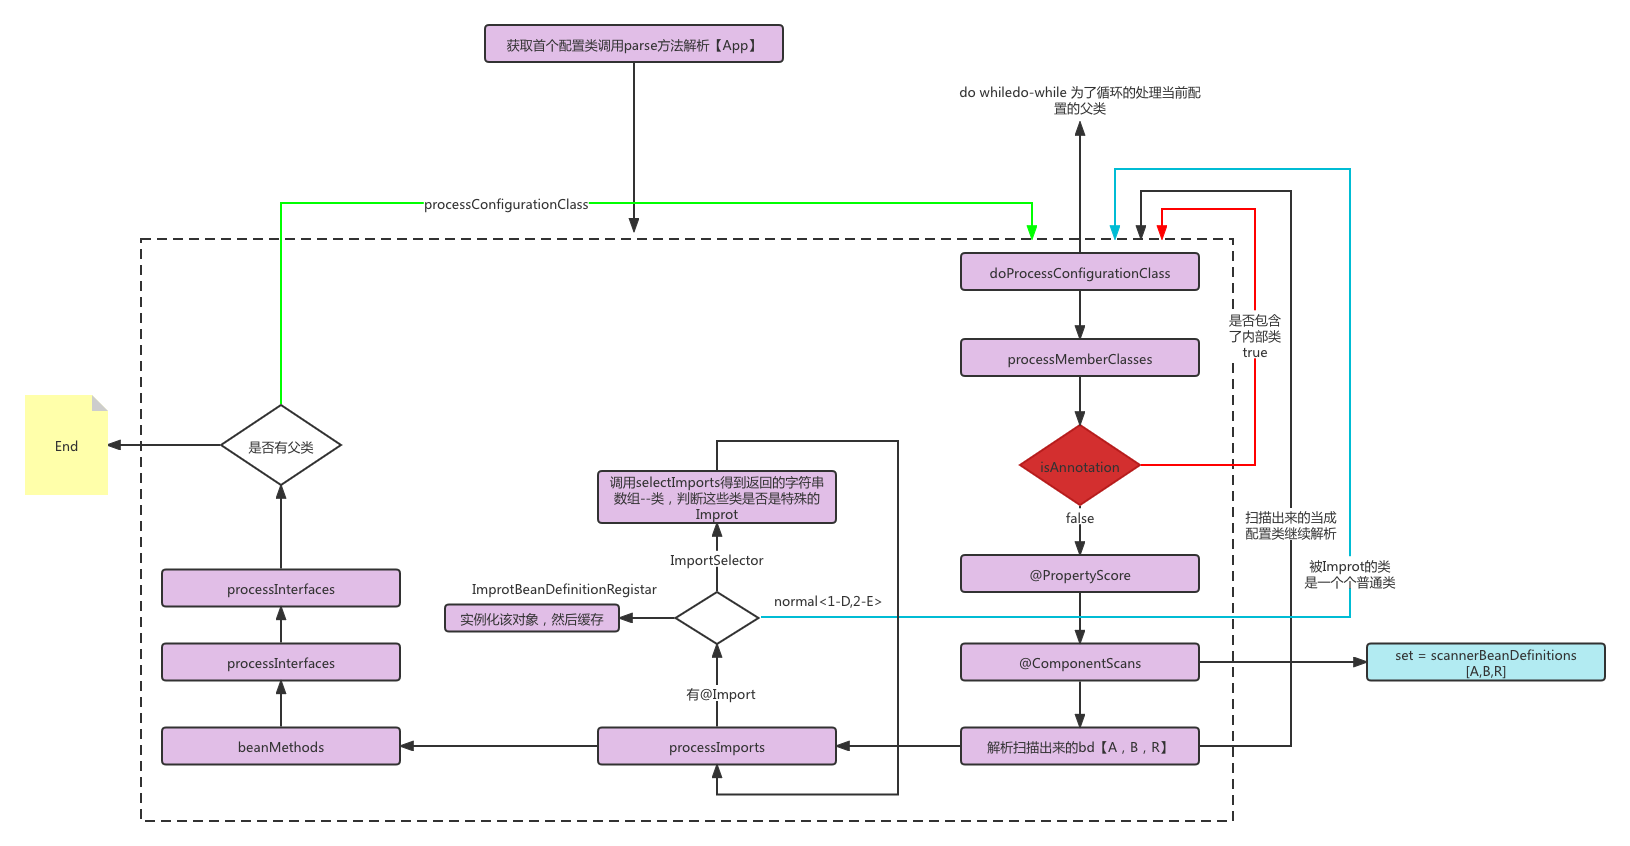
Spring源码解析流程图
Spring Boot零配置和内嵌Tomcat
如何内嵌一个Web容器
以Tomcat为例,参考SpringBoot的原理可以来内嵌一个Tomcat:
1. 添加依赖
<dependency>
    <groupId>org.springframework</groupId>
    <artifactId>spring-webmvc</artifactId>
    <version>5.2.9.RELEASE</version>
</dependency>
<dependency>
    <groupId>org.apache.tomcat.embed</groupId>
    <artifactId>tomcat-embed-core</artifactId>
    <version>8.5.71</version>
</dependency>
<dependency>
    <groupId>com.alibaba</groupId>
    <artifactId>fastjson</artifactId>
    <version>1.2.78</version>
</dependency>
2. 编写启动代码
public class SpringApplication {
    public static void run() {
        // 实例化tomcat
        Tomcat tomcat = new Tomcat();
        tomcat.setPort(9090);
        Context context = tomcat.addWebapp("/", "");
        Wrapper d = tomcat.addServlet(context, "d", new ShadowServlet());
        d.addMapping("你自己的代码");
        d.setLoadOnStartup(1);

        try {
            tomcat.start();
        } catch (LifecycleException e) {
            e.printStackTrace();
        }

        // 阻塞
        tomcat.getServer().await();
    }
}
3. 测试调用
public class Test {
    public static void main(String[] args) {
        SpringApplication.run();
    }
}
传统SpringMVC开发流程
- 配置web.xml
- 配置spring-mvc.xml
- 配置applicationContext.xml
如何实现零配置
1. 去掉web.xml
配置监听器主要是为了借助applicationContext.xml当中配置的信息来初始化spring容器。applicationContext.xml主要配置:
- bean标签
- 扫描业务类(dao、service)的功能
这些扫描完全可以通过配置类的@ComponentScan("com.shadow")来完成,因此applicationContext.xml可以完全去掉。
2. 去掉spring-mvc.xml
注册servlet的方法有多种:
- XML配置(传统方式)
- 直接new一个servlet调用API给容器
spring-mvc.xml主要完成:
- 扫描controller
- 配置视图解析器
- JSON解析器
- 文件上传等功能
这些配置都可以通过实现WebMvcConfigurer接口来替代,因此spring-mvc.xml也可以去掉。
3. 实现零配置示例
@Configuration
@ComponentScan("jinggo.wang.spring.zhss")
@EnableWebMvc
public class App implements WebMvcConfigurer {
    @Override
    public void configureMessageConverters(List<HttpMessageConverter<?>> converters) {
        converters.add(new FastJsonHttpMessageConverter());
    }
}
public class SpringApplication {
    public static void run() {
        // 实例化 spring 容器
        AnnotationConfigWebApplicationContext configWebApplicationContext =
                new AnnotationConfigWebApplicationContext();
        configWebApplicationContext.register(App.class);

        // 手动 new DispatcherServlet
        DispatcherServlet servlet = new DispatcherServlet(configWebApplicationContext);

        // 实例化tomcat
        Tomcat tomcat = new Tomcat();
        tomcat.setPort(9090);
        Context context = tomcat.addWebapp("/", "");
        Wrapper d = tomcat.addServlet(context, "d", new ShadowServlet());
        d.addMapping("你自己的代码");
        d.setLoadOnStartup(1);

        try {
            tomcat.start();
        } catch (LifecycleException e) {
            e.printStackTrace();
        }

        // 阻塞
        tomcat.getServer().await();
    }
}
Servlet 3.1新特性
上述实现方式虽然可以实现零配置,但仅适用于内嵌Tomcat。为了让内嵌Tomcat和外部Tomcat都能使用,Spring提供了以下解决方案:
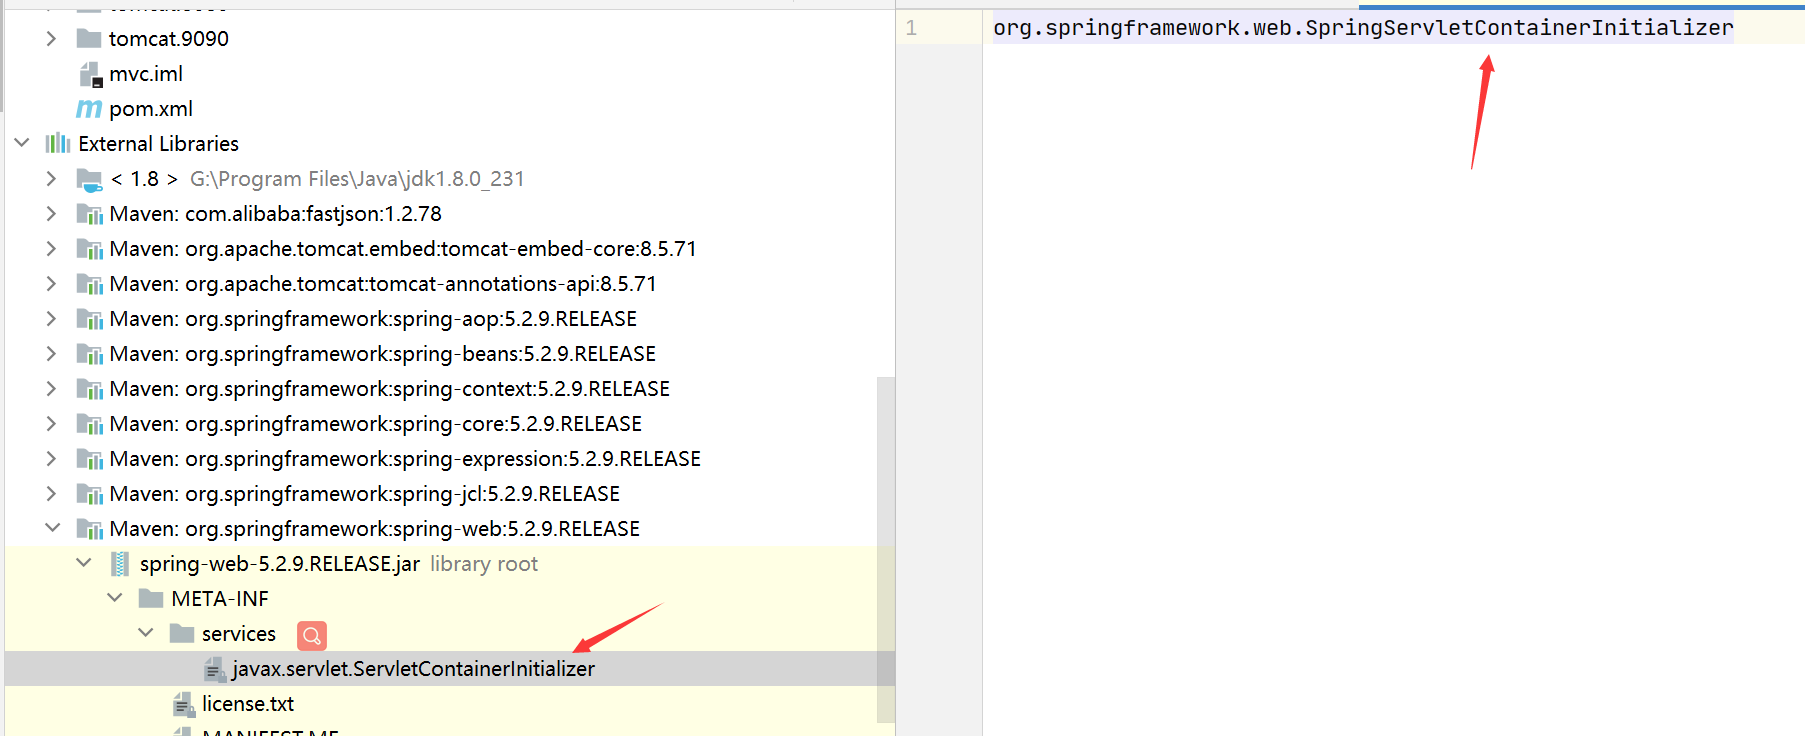
当容器(Tomcat)启动时,会去加载META-INF\services\javax.servlet.ServletContainerInitializer文件中配置的类。前提是这个配置的类必须实现特定接口ServletContainerInitializer。
Spring WebMVC提供了这样的配置和实现类:
并且在这个类上添加了注解:
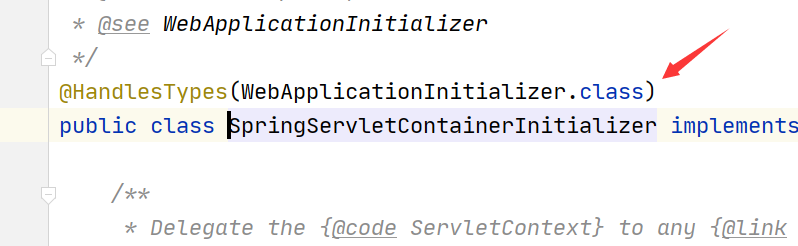
这样在Tomcat回调这个类的onStartup方法时,就能获取当前项目中所有实现了WebApplicationInitializer接口的类。Spring会实例化这些类并调用它们的onStartup方法。具体实现可参考org.springframework.web.SpringServletContainerInitializer#onStartup()方法。
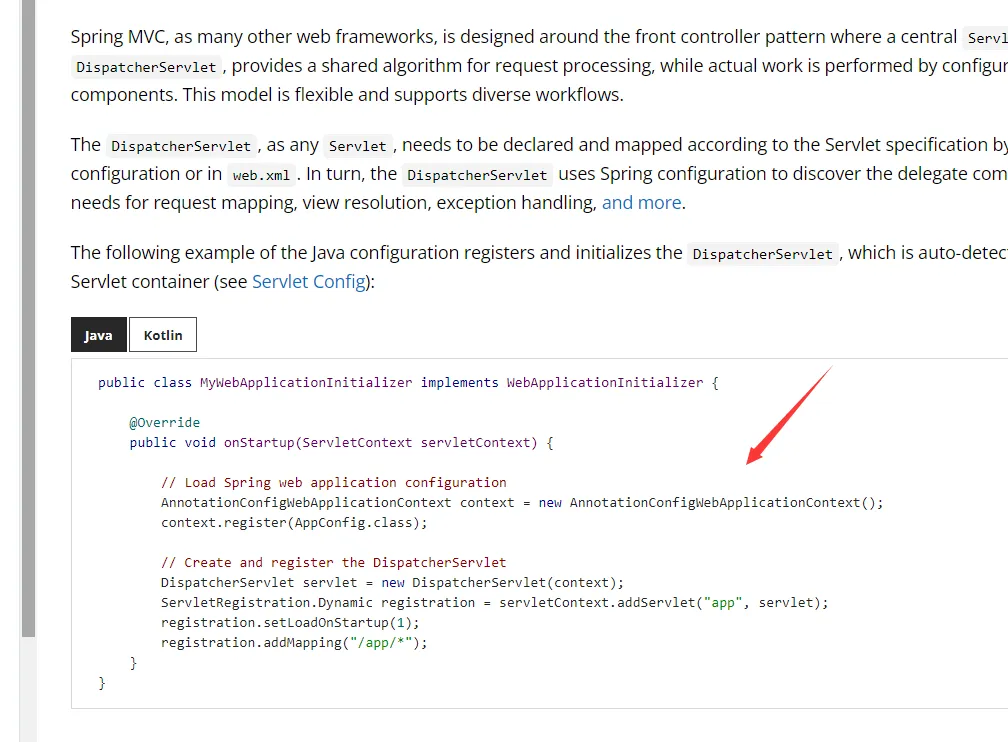
因此,Spring官方建议我们直接写一个类实现WebApplicationInitializer接口,在这个类的onStartup方法中实现启动Spring容器的代码: